First Use
Use a simple mesh (a UV-unwrapped cube is enough) to confirm each DCC you care about.
Bridge Directions
Some directions auto-import; others need a button in that DCC.
| Send | Receive | Auto? | What you do |
|---|---|---|---|
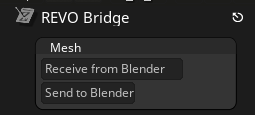
| Blender → ZBrush | ZBrush | No | In ZBrush, click Receive from Blender. Receive overwrites the active SubTool |
| ZBrush → Blender | Blender | Yes | In ZBrush, click Send to Blender. Blender auto-imports if that option is on |
| Blender → Maya | Maya | Yes | Export to Maya. Maya auto-imports after the plugin is installed |
| Maya → Blender | Blender | Yes | In Maya, Export to Blender. Blender auto-imports if that option is on |
| Blender → Toolbag | Toolbag | Yes | Export to Toolbag or Create Bake Project. Blender launches Toolbag with the REVO Bridge plugin as a boot script, so the window opens and Toolbag imports |
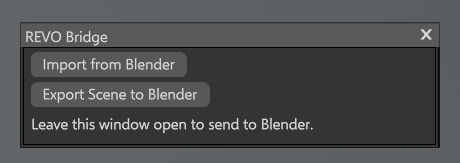
| Toolbag → Blender | Blender | File yes, plugin no | In Toolbag open Edit > Plugins > Revo_Bridge and leave it open, then Export Scene to Blender. Blender auto-imports that file. Focusing Toolbag does not start the plugin |
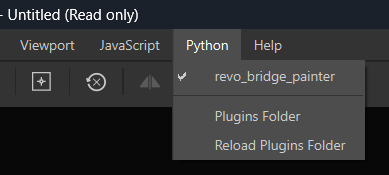
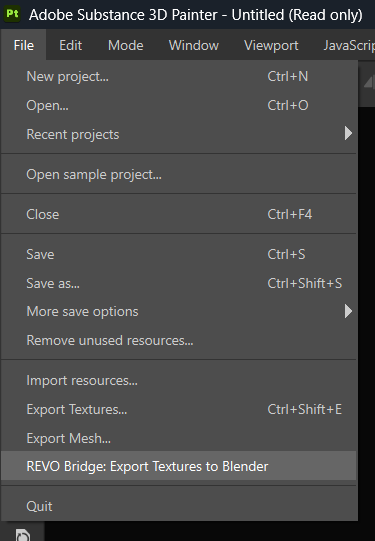
| Blender ↔ Painter | Both | Yes | Create Painter Project, then Painter File > REVO Bridge: Export Textures to Blender |
Before you start
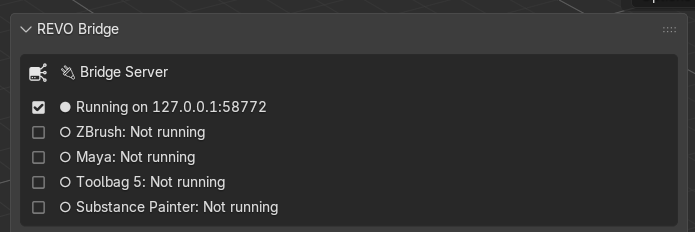
- The bridge server is Running in the N-Panel.
- Executable paths are set under Utilities.
- Plugins were installed from Integrations and the DCC was restarted.
ZBrush
- Select one or more mesh objects in Blender.
- Click Export to ZBrush.
- In ZBrush, check the active SubTool — receive overwrites it.
- Click Receive from Blender in the REVO Bridge palette.
- Use Send to Blender, then Import from ZBrush in Blender (or wait for Blender auto-import).
Maya
- Select the mesh in Blender.
- Click Export to Maya.
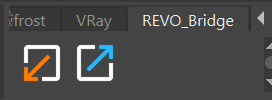
- In Maya, use the REVO_Bridge shelf Import from Blender button if auto-import is off.
- Select the character group, or its rig root and meshes, in Maya. Click the shelf's visible FBX or USD export button. Blender auto-imports it; use Import from Maya if auto-import is off.
FBX and USD carry portable hierarchy, skeleton, skinning, blend-shape, and animation data. Maya-only controller logic and custom dependency-graph nodes do not have an equivalent cross-DCC representation, so bake animation when needed.
Toolbag 5
- Select the mesh in Blender.
- Click Export to Toolbag. Default format is USD (materials and textures).
- If Toolbag was not already running, it opens with the REVO Bridge window and imports the mesh. That is the boot script, not a live hook into an existing Toolbag.
- To send back: in Toolbag choose Edit > Plugins > Revo_Bridge if that window is not already open, leave it open, then Export Scene to Blender. Blender auto-imports.
If Toolbag was already open without the plugin window, Export to Toolbag still writes the file, but Toolbag will not auto-import until you run Edit > Plugins > Revo_Bridge and click Import from Blender there.
For baking, see Toolbag Baker. Create Bake Project also launches Toolbag with the plugin so the baker is built automatically. It always uses FBX, not USD.
Painter
- Select the mesh in Blender (materials should use Principled BSDF).
- Click Create Painter Project.
- Painter opens a new project, or the working copy of the
.sppset under Existing Project.
For UDIMs, use Split by UDIM (Legacy) for one Texture Set per tile, or Use UV Tiles for one Texture Set containing its tiles.
Use Existing Project to reuse a saved Painter setup, such as a different shader or color-management settings.
When painting is complete, use Painter's File > REVO Bridge: Export Textures to Blender. Blender applies the returned maps automatically when auto-import is enabled; otherwise click Import Textures from Painter. The button can also reapply the latest successful Painter export. When Existing Project is set, REVO Bridge opens its working copy; saving in Painter overwrites that copy.
If nothing happens
See If send or receive stops in the FAQ.